Developing modifications in a workspace
Learn how to develop modifications in a workspace.
If you're not already familiar with modifications and how to create them in the Frosmo Control Panel, see the feature overview and guide.
Creating a new modification in a workspace
To create a modification in a workspace:
-
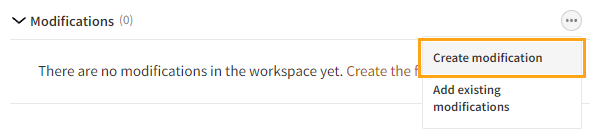
Click the quick menu button for Modifications, and select Create modification.
-
Define the modification settings. Follow the instructions for creating a modification in Creating and editing a modification, starting with step 3.
-
When you're done, click Close.
When you publish the workspace, the Frosmo Control Panel automatically sets the display start time of the modification to the time the modification is published to production, unless the start time set in the workspace is in the future, in which case the Control Panel does not change the start time.
Adding existing modifications to a workspace
When you add an existing modification from production to a workspace, the Frosmo Control Panel creates a duplicate of the modification and places the duplicate in the workspace. In production, the original modification remains unaffected and continues to display to visitors as before. Editing the workspace modification does not affect the original production modification.
When you preview the workspace modification, all events tracked for the modification, including basic events and custom events, are associated with the workspace modification and not the original production modification. For more information about these events, see Modification statistics.
To access the original production modification of a workspace modification, click the quick menu button for the workspace modification, and select Edit original.
When you publish the workspace, you can choose to either overwrite the production modification with the workspace version or create a new production modification from the workspace version.
To add existing modifications to a workspace:
-
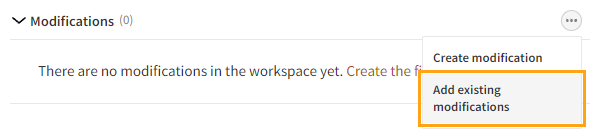
Click the quick menu button for Modifications, and select Add existing modifications.
-
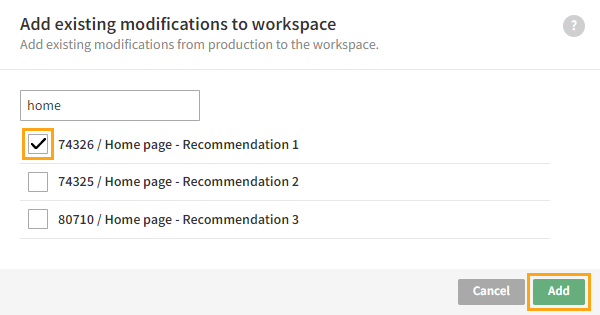
Select the modifications you want to add to the workspace, and click Add. You can filter the modifications by typing a modification ID or name in the search field.
Editing a modification in a workspace
Once you've created a new modification or added an existing modification to a workspace, you can continue developing the modification.
To edit the modification:
-
In the modifications list, click the name of the modification you want to edit.
-
Edit the modification settings. Follow the instructions for editing a modification in Creating and editing a modification, starting with step 3.
-
When you're done, click Close.
Duplicating a modification in a workspace
To duplicate a modification:
-
In the modifications list, click the name of the modification you want to duplicate.
-
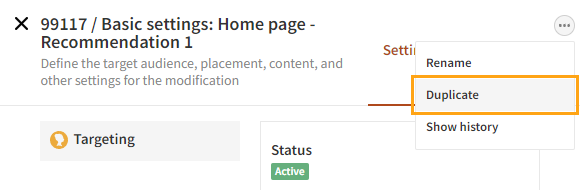
In the Basic settings view, in the upper right corner, click the quick menu button, and select Duplicate.
-
Define the modification settings. Follow the instructions for creating a modification in Creating and editing a modification, starting with step 3.
-
When you're done, click Close.
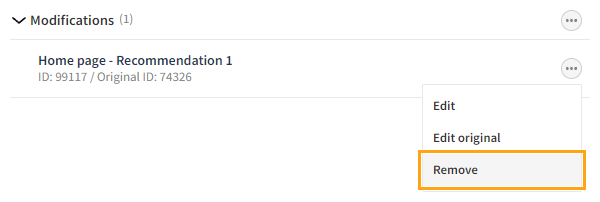
Removing a modification from a workspace
Removing a modification from a workspace deletes that modification. Any edits you've made to the modification in the workspace are lost. If the modification is based on an existing modification in production, the original modification is not affected in any way.
To remove a modification from a workspace:
-
In the modifications list, click the quick menu button for the modification you want to remove, and select Remove.
-
In the confirmation prompt, click Remove.