Example: Recommending products purchased together (configuration)
This example shows you how to create a recommendation for products that visitors typically purchase together. The example uses a recommendation configuration to generate the recommendation data. The example covers the entire development workflow from creating and testing the configuration to creating the modification that displays the recommendation.
In this example, you:
-
Create a recommendation configuration for the top 10 products purchased together with a given product in the past 30 days.
-
Create a customizable template for a product recommendation slider. The template uses the Recommendations API for populating the slider with recommendation data generated from the recommendation configuration.
-
Create a modification and associated placement for displaying the recommendation on product pages. The modification uses the recommendation slider template for its content.
You create all the components of the recommendation in the Frosmo Control Panel.
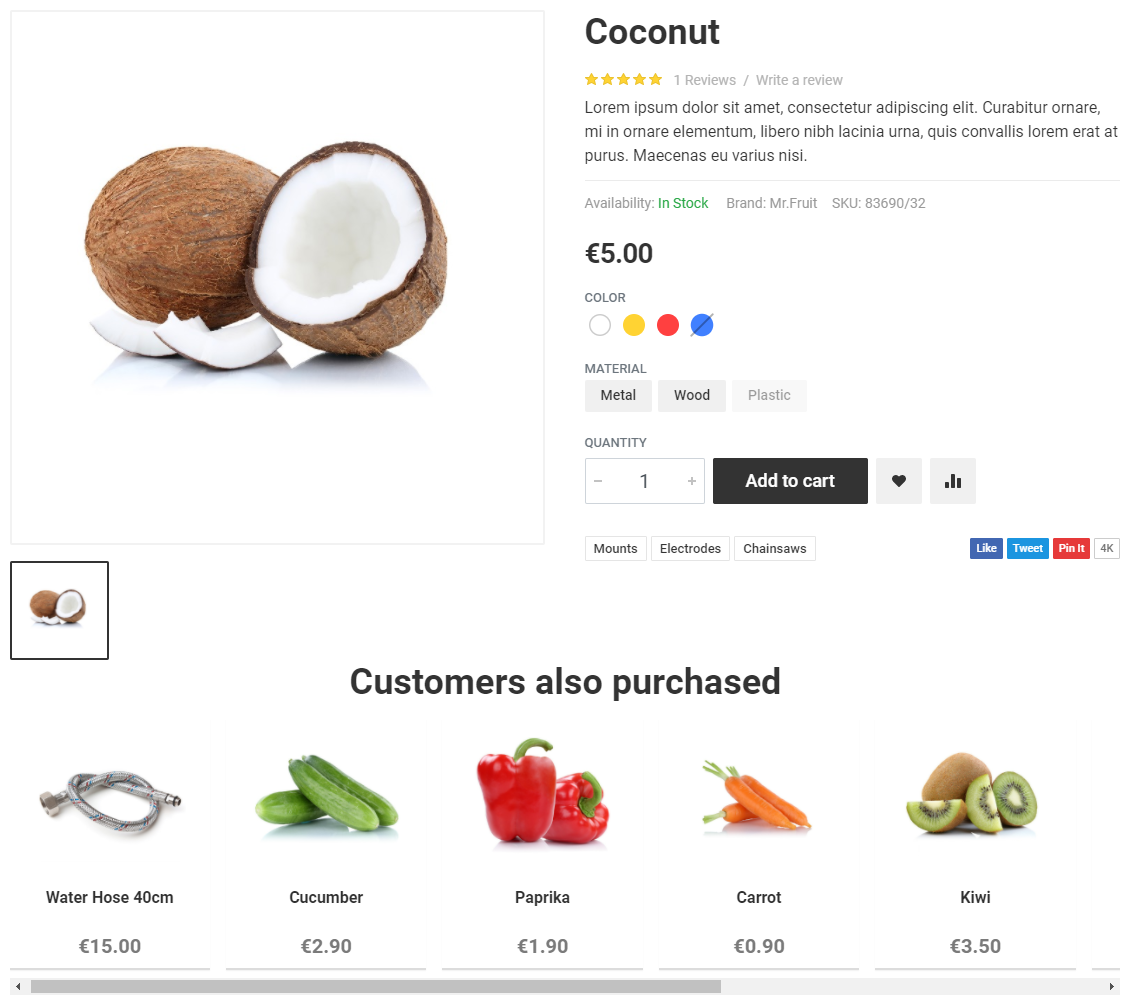
The following figure shows an example of the final recommendation on a product page.
For generating the recommendation, this example relies on product data and transaction data collected from the site. The example therefore assumes that product and transaction tracking are correctly set up on the site.
If you're trying out this example on a production site, but do not want the example to interfere with production content, use either test mode or a workspace in creating the example. You can also safely preview the modification from the Control Panel.
To create the recommendation:
-
Create the modification and associated placement for displaying the recommendation on product pages.
Creating and testing the recommendation configuration
The recommendation configuration returns up to 10 other products most often purchased together with a given product in the past 30 days.
Creating the recommendation configuration
To create the recommendation configuration:
-
In the Frosmo Control Panel, in the sidebar, select More > Recommendations.
-
Select the Configurations tab.
-
Click Create recommendation configuration.
-
In the code editor, replace the default recommendation configuration with the following code.
{
    "name": "Products purchased together",
    "description": "Top 10 products purchased together with the current product in the past 30 days",
    "type": "bundle_converted",
    "frequency": "1d",
    "hours": 720,
    "limit": 10,
    "map_ids": "product",
    "params": [
        "productId"
    ],
    "options": {
        "product_attrs": [
            "id"
        ]
    }
}
Note the following settings:
-
type:bundle_convertedis the recommendation type for products purchased together. -
frequency:1dmeans that the recommendation data is regenerated once per day based on the latest usage data collected from the site. -
hours:720means that the recommendation data is always generated from the last 720 hours (30 days) of usage data collected from the site (in this case, product and transaction data). -
limit:10is the maximum number of products to include in the recommendation data. This is the number of other products to recommend for a given product. If customers have purchased more than 10 products together, the recommendation returns the 10 most purchased products. -
map_ids:productinstructs the platform to return the full product data for each recommended product. The alternative is to return the raw recommendation data for each product, but then you'd have to separately retrieve the product data to display in the modification. -
params: Product recommendations whose type isbundle_convertedrequire a single request parameter: the target product attribute against which the recommendation is generated. This example recommends products based on a given product, so the parameter must identify that product. Hence, the product ID, which is here namedproductId. -
options: Theproduct_attrsarray tells the platform how to map the request parameters defined inparamsto product attributes in product data. This example defines a single request parameter,productId, which maps to theidattribute of products.
For more information about the settings, see the recommendation configuration reference.
-
-
Click Save. The platform queues the recommendation configuration for data generation.
-
To return to the recommendation configurations list, click Cancel.
You have created the recommendation configuration. Once the recommendation configuration status changes to Success, the recommendation data has been successfully generated, and you can retrieve and review the data.

Testing the recommendation configuration
Testing the recommendation configuration means reviewing the generated recommendation data to ensure that the data meets your expectations.
To test the recommendation configuration:
-
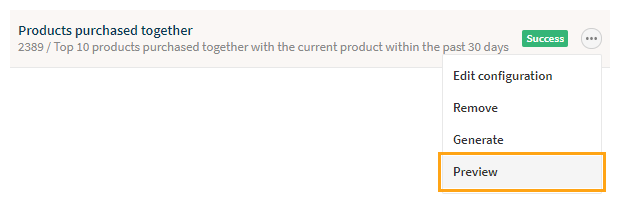
In the Control Panel, in the recommendation configurations list, find the configuration, click the quick menu button for the configuration, and select Preview.
-
Enter a product ID in the request URL, so that you can view the recommendation data for a specific product.


If the product has been purchased together with other products by one or more visitors in the past 30 days, the page displays the corresponding recommendation data in the JSON format. If the product has not been purchased together with other products, or if the product ID is invalid, the page displays an error.
If you need to find out what products IDs are available on your site, make a Graniitti API GET request to
/sites/<site_id>/products, and check theproduct_idvalues in the response data.curl -X GET \
--header 'Authorization: Bearer <access_token>' \
'https://<graniitti_api_base_url>/sites/<site_id>/products'
You have tested the recommendation configuration. You can now use its recommendation data in a modification.
Creating the recommendation slider template
The template creates a simple product recommendation slider. The template provides variation content options for customizing the title and the number of displayed products for the slider. The template uses content prerendering to fetch and process the recommendation data before building and rendering the final slider element.
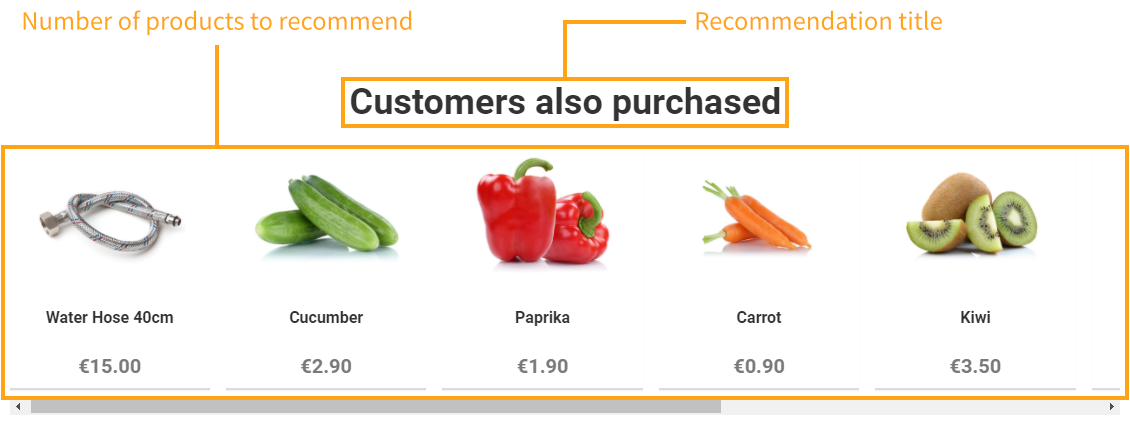
Figure: Customizable parts of the recommendation slider (click to enlarge)
To create the recommendation slider template:
-
In the Control Panel, in the sidebar, select Modifications.
-
Select the Templates tab.
-
Click Create template.
-
Define the following settings:
-
Name: Enter "Product recommendation slider".
-
Export content: Leave this field to Automatic.
-
Minified: Leave this to Enabled.
-
Content: Enter the following content for the template.
Content for the template<!-- HTML content of the modification -->
<h3>{{title}}</h3>
<div class="reco-slider">
<div class="reco-slider-products">
{{#products}}
<div class="reco-slider-product-container">
<a class="product" href="{{{attributes.url}}}" data-product-id="{{id}}">
<img alt="{{{name}}}" class="product-image" src="{{attributes.image}}" />
<div class="product-name">{{{name}}}</div>
<div class="product-price">{{attributes.price}} €</div>
</a>
</div>
{{/products}}
</div>
</div>
<!-- CSS for styling the HTML content of the modification -->
<style>
.reco-slider {
display: flex;
flex-direction: column;
width: 100%;
max-width: 100vw;
}
.reco-slider > * {
box-sizing: border-box;
}
.reco-slider-products {
display: flex;
overflow-x: scroll;
/* Scroll snap for browsers that support it */
scroll-snap-type: x mandatory;
/* Use momentum-based scrolling on wekbit */
-webkit-overflow-scrolling: touch;
}
.product {
display: flex;
flex-direction: column;
/* Product card spacing */
margin: 0.5em;
/* Product card padding */
padding: 0.5em;
background-color: white;
border: 0 none;
border-bottom: 2px solid #dcdcdc;
box-shadow: 0 1px 1px rgba(0,0,0,0.05);
/* Scroll snap for browsers that support it */
scroll-snap-align: start;
}
.product-image {
align-self: center;
object-fit: contain;
width: 100%;
max-width: 100%;
min-height: 10em;
max-height: 10em;
padding-bottom: 0.5em;
}
.product-name {
/* Webkit ellipsis (...) */
display: -webkit-box;
-webkit-line-clamp: 2;
-webkit-box-orient: vertical;
min-height: 2.8em;
max-height: 2.8em;
overflow: hidden;
color: #303030;
font-weight: bold;
line-height: 1.4em;
text-align: center;
}
.product-price {
color: #7a7a7a;
font-weight: bold;
font-size: 20px;
line-height: 1.4em;
text-align: center;
}
/* Responsive container */
.reco-slider-product-container {
/* Leave 3rd item as teaser */
min-width: 45%;
max-width: 45%; /* Force size even if 1 item */
}
@media (min-width: 700px) {
.reco-slider-product-container {
/* Leave 4th item as teaser */
min-width: 32%;
max-width: 32%;
}
}
@media (min-width: 850px) {
.reco-slider-product-container {
/* Leave 5th item as teaser */
min-width: 23.5%;
max-width: 23.5%;
}
}
@media (min-width: 1024px) {
.reco-slider-product-container {
/* Leave 6th item as teaser */
min-width: 19.5%;
max-width: 19.5%;
}
}
</style>The content defines the HTML and CSS code for the recommendation slider. The content includes multiple Mustache tags, which need to be replaced with specific values in the final rendered content.
Feel free to edit the content to adapt the slider to your site's layout and style.
-
Content prerenderer: Enter the following content prerenderer for the template.
Content prerenderer for the template/**
* Let's assume the product data is available in a global "window.product"
* object. The "window.product.id" property contains the product ID.
*
* If the global product object is available, create the recommendation.
*/
if (window.product) {
createRecommendation(window.product.id);
} else {
console.log("No product data available on the page.");
}
/**
* Create the recommendation for the specified product.
* @param {number} prodId Product ID
* @returns {void}
*/
function createRecommendation(prodId) {
// REPLACE WITH THE RECOMMENDATIONS API BASE URL FOR YOUR FROSMO PLATFORM INSTANCE!
var apiBaseUrl = "https://inpref.com/recoApi/v2";
// REPLACE WITH YOUR SITE ORIGIN!
var origin = "shop_company_com";
// Build the Recommendations API request URL.
var apiUrl = apiBaseUrl
+ "?method=multifetch"
+ "&origin=" + origin
+ '&recos=[{"name":"Products%20purchased%20together","params":{"productId":"' + prodId + '"}}]';
// Get the recommendation data from the Recommendations API.
fetch(apiUrl)
// Return the response as JSON.
.then(function (res) {
if (!res.ok) {
return res.text().then(function (text) {
throw new Error(text);
});
}
return res.json();
})
// Extract the recommendation data, and render the recommendation.
.then(function (res) {
var data = res.data[0];
renderRecommendation(data);
})
.catch(function (err) {
console.error(err);
});
}
/**
* Render the recommendation.
* @param {string} results Recommendation results to render
* @returns {void}
*/
function renderRecommendation(results) {
// Build the content options for the template renderer.
// Restrict the number of products based on "numberOfProducts".
var options = {
title: templateInstance.options.title,
products: results.slice(0, templateInstance.options.numberOfProducts)
};
// Render the template content with the content options.
templateInstance.render(options);
}The content prerenderer:
-
Fetches the recommendation data by calling the Recommendations API.
-
Builds the final content options with which to render the template content. These are the values for the Mustache tags in the content. The values include the recommendation title, which comes from the
titlecontent option set in the modification variation, and the final set of recommended products, which the prerenderer crops from the recommendation data based on thenumberOfProductscontent option set in the modification variation. -
Triggers the template content to be rendered with the final content options.
In the code, replace the values of the
apiBaseUrlandoriginvariables with values appropriate to your Frosmo Platform instance and site. To get the values, see Graniitti API: Requests and Getting your site origin. -
-
Content options schema: Enter the following content options schema for the template.
Content options schema for the template{
"type": "object",
"title": "",
"properties": {
"title": {
"type": "string",
"title": "Recommendation title"
},
"numberOfProducts": {
"type": "integer",
"title": "Number of products to recommend",
"default": 5,
"minimum": 1,
"maximum": 10
}
},
"required": [
"title",
"numberOfProducts"
]
}The schema describes the following content options, which must be set in the content options UI of the modification variation:
-
Recommendation title (
title) -
Number of products to recommend (
numberOfProducts)
The template uses both content options to create the final recommendation slider element. While the template content uses
titleas is, the content prerenderer usesnumberOfProductsto produce the final set of recommended products with whose data the recommendation slider gets populated. -
-
Content options UI schema: To further customize the content options UI, enter the following content options UI schema for the template.
Content options UI schema for the template{
"title": {
"ui:placeholder": "Enter a display title for the recommendation"
}
}The UI schema defines a placeholder text for the Recommendation title field of the content options UI.
The following figure shows the complete template in the Control Panel. Click the figure to view a larger version.
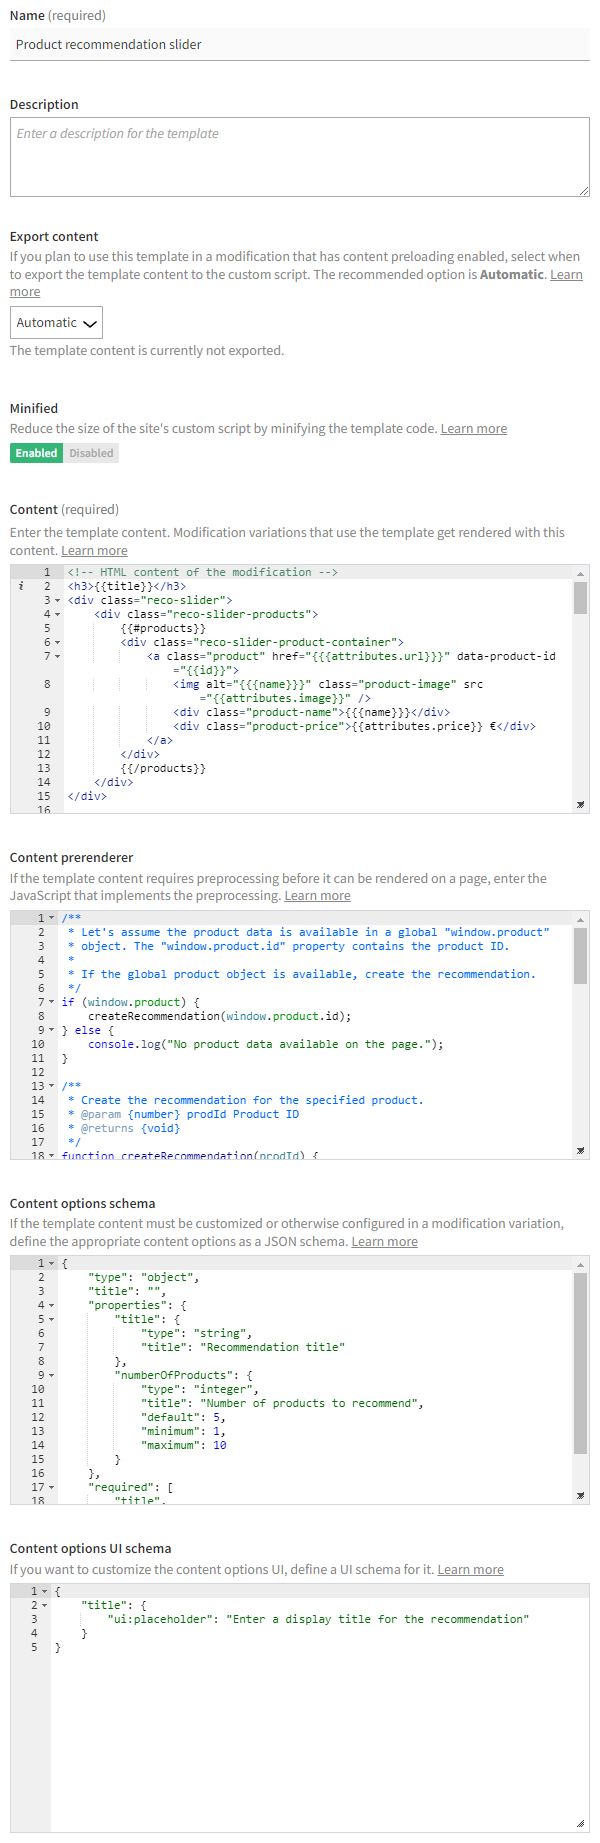
For more information about the settings, see Creating and editing a template.
-
-
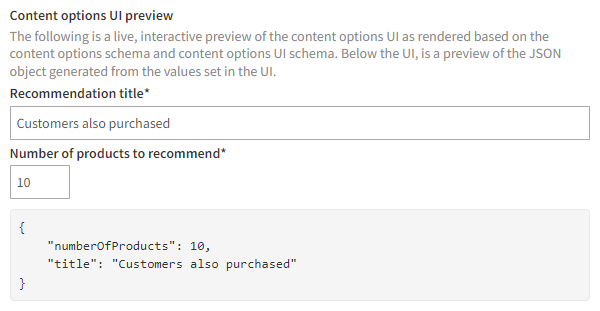
Use the content options UI preview at the bottom of the editor to test that the content options schema and content options UI schema are correctly defined.
The preview is fully interactive, so any changes you make to the schemas are automatically reflected in the preview. You can also set the content options in the preview as you would in the actual content options UI, and you can see a preview of the JSON object generated based on the set values.
The following figure shows the content options UI preview for template.
-
Click Save.
You have created the template. You can now use the template in a modification to display the template content.
Displaying the recommendation
When a visitor navigates to a product page, they see a recommendation for up to 10 other products that visitors have typically purchased together with the current product.
For example purposes, let's assume that a product page can be identified by /product/ in the page URL, and that the main product details are contained in a <div class="product-info"> element. You'll place the recommendation slider below the main product details on every product page.

The URL scheme, content layout, and source code structure of a product page on your site almost certainly differ from the above. You could also use a trigger instead of a URL matcher to identify product pages, and you might want to place the recommendation slider differently.
To display the recommendation:
Creating the recommendation slider placement
To create the recommendation slider placement:
-
In the Control Panel, on the Modifications page, select the Placements tab.
-
Click Create placement.
-
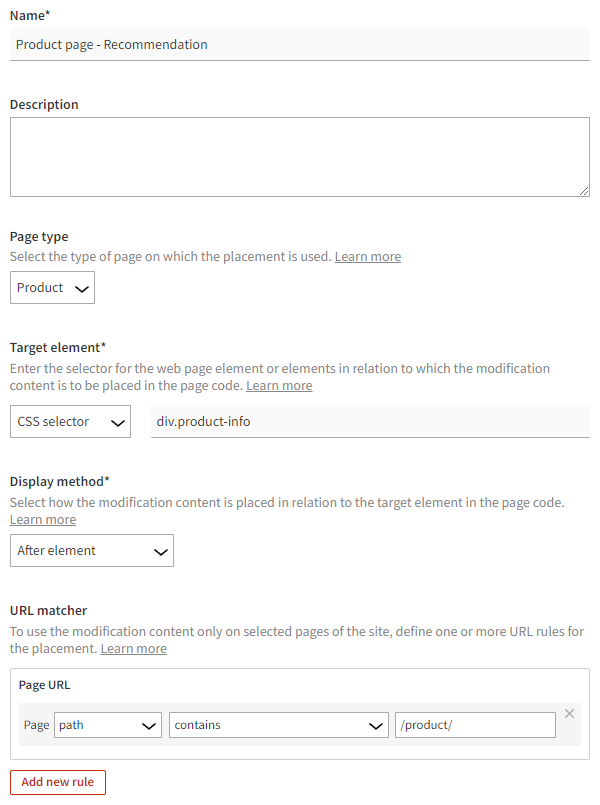
Define the following settings:
-
Name: Enter "Product page - Recommendation".
-
Page type: Select Product.
-
Target element: Select CSS selector, and enter "div.product-info" as the selector name.
-
Display method: Select After element.
-
URL matcher: Click Add new rule. Since only product page URLs contain
/product/in their path, define the following rule: Page path contains /product/. This means that the placement is valid for a page only when the page URL path contains "/product/".
The target element, display method, and URL matcher together place the modification below the main product details on every product page.
For more information about the settings, see Creating and editing a placement.
-
-
Click Save.
You have created the placement. You can now use the placement in a modification.
Creating the recommendation slider modification
To create and activate the recommendation slider modification:
-
In the Control Panel, on the Modifications page, select the Overview tab.
-
Click Create modification.
-
Enter "Product page - Recommendation - Purchased together" as the modification name, select Personalization as the modification case, and click Create.

You could also select another case, but since this modification needs only the one variation, Personalization is the natural choice here.
For more information about the settings, see Creating and editing a modification.
-
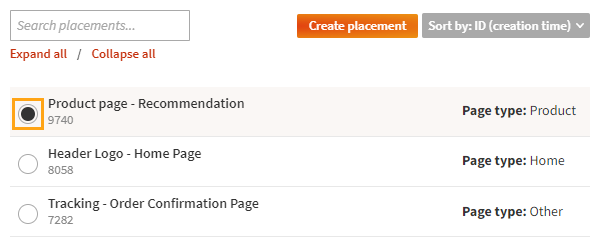
Select the placement for the modification:
-
In the Basic settings view, in the Placement section, click Select placement.
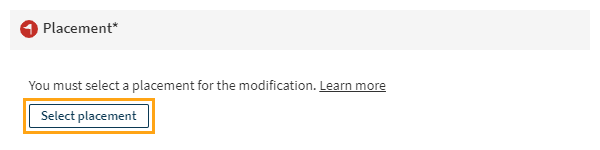
-
Select the placement you created for the recommendation slider.
-
Click Save.
For more information about the settings, see Defining the placement for a modification.
-
-
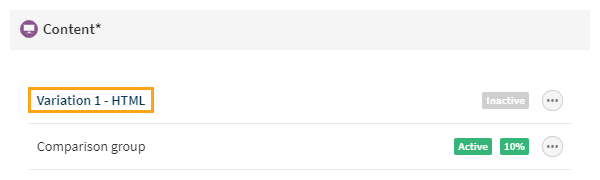
Define the content for the modification:
-
In the Basic settings view, in the Content section, click the variation name.
-
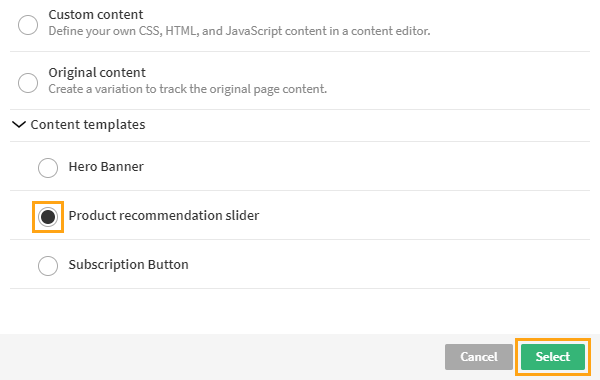
In the Variation settings section, click Select type.
-
In the Content templates list, select the template you created for the recommendation slider, and click Select.
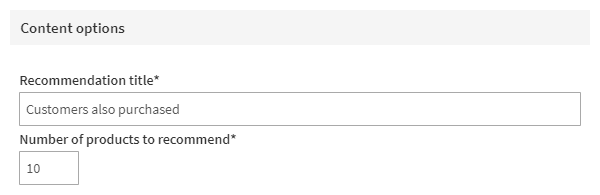
-
In the Content options section, define the content options. You must define both Recommendation title and Number of products to recommend. The following figure shows one example of setting the options.
-
At the bottom of the view, click Save.
-
Back in the Content section, click the quick menu button for the variation, and select Activate.

-
If you want to disable the comparison group for the modification, click the quick menu button for the group, and select Deactivate.
For more information about the settings, see Defining the content for a modification.
-
-
Activate the modification:
-
At the bottom of the Basic settings view, click Activate.
-
To confirm, click Activate.
-
You have created and activated the modification. The recommendation is now live, and you're done with this example!