Using a custom action with other features
Learn how to use a custom action with other Frosmo Platform features.
Displaying a modification based on a custom action
In a modification, a state is a custom action with a specific value that controls whether the modification is displayed to a visitor. If you set a custom action value as a state for a modification, the modification is only displayed to visitors who complete that custom action with that value. For example, you can set a modification to be displayed only to logged-in visitors by tracking login status with a basic custom action and setting the custom action's logged-in value as a state for the modification.
You can set multiple states for the same modification, and you can select them from multiple custom actions.
For custom actions to work correctly as states, a Frosmo developer must first set up the site's custom script accordingly. Do not use custom actions as states before Frosmo has informed you it is safe to do so. For more information, contact Frosmo support.
Setting a custom action value as a state for a modification
To set a custom action value as a state for a modification:
-
In the Frosmo Control Panel, in the sidebar, select Modifications.
-
In the modifications list, find the modification you want to edit, and click the modification name.
-
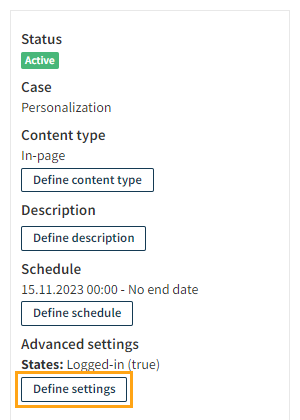
In the Advanced settings section, click Define settings.

-
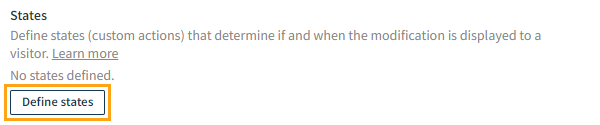
In the Audience section, click Define states.
-
Select the custom action value or values that you want to set as a state.

-
Click Select.
-
When you're done, click Save.
The modification is now displayed only to visitors who have completed the custom actions with the selected values.
Removing a custom action value as a state for a modification
To remove a custom action value as a state for a modification:
-
In the Frosmo Control Panel, in the sidebar, select Modifications.
-
In the modifications list, find the modification you want to edit, and click the modification name.
-
In the Advanced settings section, click Define settings.
-
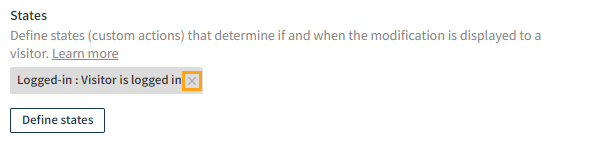
In the Audience section, click the x for the custom action value that you want to remove as a state.
-
When you're done, click Save.
The modification is no longer displayed to visitors based on the custom action value you removed as a state.
Firing a trigger based on a custom action
You can use a custom action as the event that fires a trigger. When a visitor completes the custom action, any triggers set to the custom action get fired. For example, you can use a trigger to display some new content only when the visitor completes a specific custom action. To take a more specific example: If your site displays an inactivity popup after a visitor has been idle for a set amount of time, you can trigger a custom action when the popup appears. You can then set the custom action as the event for a trigger, and attach the trigger to a placement that displays new content to the idling visitor.
To create a trigger that fires on a custom action:
-
In the Frosmo Control Panel, in the sidebar, select More > Triggers.
-
Click Create trigger.
-
In Name, enter a descriptive name for the trigger.
-
In Evaluation point, select Core event.
-
In Event, select Frosmo custom action. This means that the trigger is evaluated every time a visitor completes the specified custom action.
-
If you want to fire the trigger only on certain instances of the custom action, click Add new rule, and define the rules for firing the trigger. These rules determine in which cases completing the custom action actually fires the trigger. If you want the custom action to always fire the trigger, do not define any rules. For more information, see Creating and editing a trigger.
-
Optionally, define an alias for the trigger. For more information, see Creating and editing a trigger.
-
When you're done, click Save.
You have created the trigger. You can now use the trigger in conversion definitions, placements, and segments.
Segmenting visitors based on a custom action
You can segment your visitors based on the custom actions they complete. For example, you can segment visitors based on their geographic location as tracked by a geolocation custom action, or you can segment visitors based on what they search by tracking their search queries with a basic custom action.
If you only need a single value for your custom action, consider implementing the segmentation with a trigger instead. A custom action is ideal for cases where you need multiple values to group visitors along multiple segments.
Before you can create a segment that uses a custom action, the custom action must be available in the Frosmo Control Panel, either through having been triggered from the site or created in the Control Panel. If you plan to base the segment on specific values of the custom action, those values must also be available. For a geolocation custom action, this simply means that you must first create the custom action with the appropriate values in the Control Panel. For a basic custom action, you need to do one of two things:
-
Implement the custom action tracking on your site, wait for visitors to complete the custom action so that the action gets stored in the Frosmo back end along with its values, and then create the related segments in the Control Panel.
-
Create the custom action with the necessary values in the Control Panel, create the related segments, and then implement the custom action tracking on your site.
To create a segment that uses a custom action:
-
In the Control Panel, in the sidebar, select Audiences.
-
Click Create segment.
-
Click Add new rule, click Custom action, and define the segmentation rule. Remember to select the correct custom action and whichever values you want to use for this segment. For more information, see Creating and editing a segment.
-
Set the time limit for the segment. For more information, see Creating and editing a segment.
-
Select Description, and enter a descriptive name for the segment. You can also enter a description to better remember what the segment is about.
-
When you're done, click Save.
You have created the segment. Visitors who complete the custom action with one of the selected values are now placed in the segment.
For examples of segments that use custom actions, see Segment examples.