Creating and editing a custom action
Learn how to create and edit a custom action, and define the settings for the custom action.
About creating custom actions
Basic custom actions are typically created through tracking rather than directly in the Frosmo Control Panel. In other words, the tracking code triggers a new custom action on your site, the custom action data gets stored in the Frosmo back end, and the custom action becomes available in the Control Panel. You can then edit the custom action and give it, for example, a description.
Basic custom action values are also typically added through tracking (when a custom action is triggered with a new value) rather than in the Control Panel (by manually defining a new value). However, you can further define the values in the Control Panel by giving them descriptive titles.
Geolocation custom actions are created in the Control Panel. Once created, the Frosmo JavaScript library takes care of tracking the visitor's location and triggering the custom actions as necessary.
Creating a custom action
To create a custom action:
-
In the Frosmo Control Panel, in the sidebar, select More > Custom Actions.
-
Click Create custom action.
-
Define the custom action settings.
-
When you're done, click Save.
You can now use the custom action to implement other features.
If you created a basic custom action, you still need to implement tracking for it, before any features built on it can function correctly. Make sure the name and values used in the tracking match the ones you defined in the Control Panel.
Editing a custom action
To edit a custom action:
-
In the Frosmo Control Panel, in the sidebar, select More > Custom Actions.
-
In the custom actions list, find the custom action you want to edit, click the quick menu button for the custom action, and select Edit.

-
Edit the custom action settings.
noteIf you're editing a basic custom action, only edit the regular value-name pairs. If you're editing a geolocation custom action, only edit the geolocation values.
-
When you're done, click Save.
Custom action settings
To define the settings for a custom action:
-
Select Values.
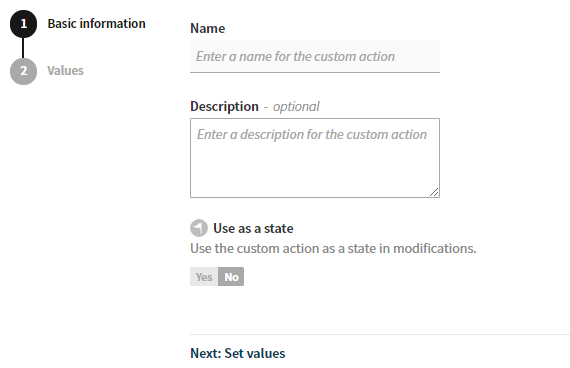
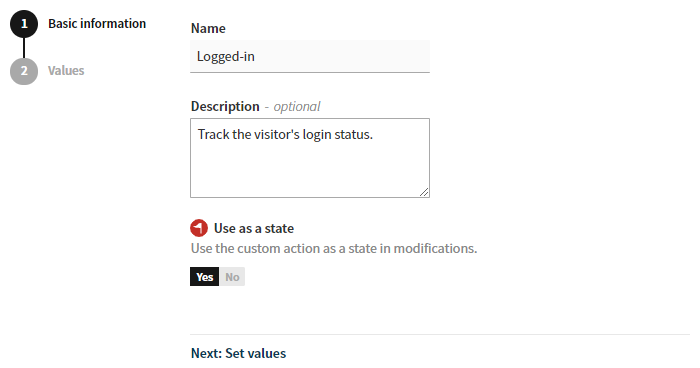
Basic information
The following table describes the basic information you can define for a custom action in the Frosmo Control Panel.
| Setting | Description | Role |
|---|---|---|
Name | Enter a name for the custom action. | Required |
Description | Enter a description for the custom action. | Optional |
Use as a state | If you want to use the custom action as a state in modifications, enable this setting. For more information, see Using custom actions with other features. note You cannot use geolocation custom actions as states in modifications. | Required |
Values
You can define one or more values for a custom action. You can define the values either for a basic custom action or a geolocation custom action, but not both. Your choice determines the type of the custom action.
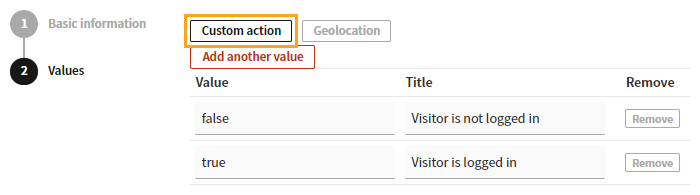
Basic custom action
To define the values for a basic custom action:
-
In the Values view, select Custom action.
-
Enter a Value and optionally its Title. The value is case-sensitive and must be unique for this custom action.
-
To add another value, click Add another value, and repeat from the preceding step.
-
To remove a value, click Remove for the value.
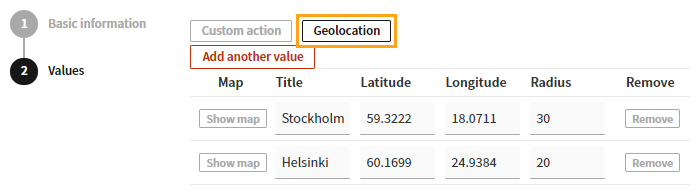
Geolocation custom action
To define the values for a geolocation custom action:
-
In the Values view, select Geolocation.
-
Enter a Title for the location you want to track, and define the location either by entering its Latitude, Longitude, and Radius, or by clicking show map and drawing the location on the map. To hide the map, click show map again.
-
To add another location, click Add another value, and repeat from the preceding step.
-
To remove a value, click Remove for the value.