Example: Creating personalized content in React
This example shows you how to incorporate Frosmo-managed content in a React application using the Frosmo React Connector. You first create a plain modification with a single variation that is displayed to all visitors in the page header. The content of the modification is a Frosmo logo that links to the Frosmo home page. You then personalize the modification by only displaying it to visitors who have not opened the logo link.
This example uses Create React App as its development environment and single-page application template.
This example assumes that the Frosmo SPA module is enabled for your site.
Since this example is designed for a single person to complete, the workflow is slightly different from the generic development workflow, which assumes two people working on the content. In this example, you first create the placement and modification in the Frosmo Control Panel, and you then work with React. This is purely for convenience. You could equally well reverse the order and follow the generic workflow.
To create the content:
-
Create the placement and modification for the content in the Frosmo Control Panel.
-
Create the
FrosmoPlacementand other components for the content in Create React App.
Creating the placement and modification
Creating the placement
To create the placement:
-
In the sidebar, select Modifications.
-
Select the Placements tab.
-
Click Create placement.
-
Define the following settings:
-
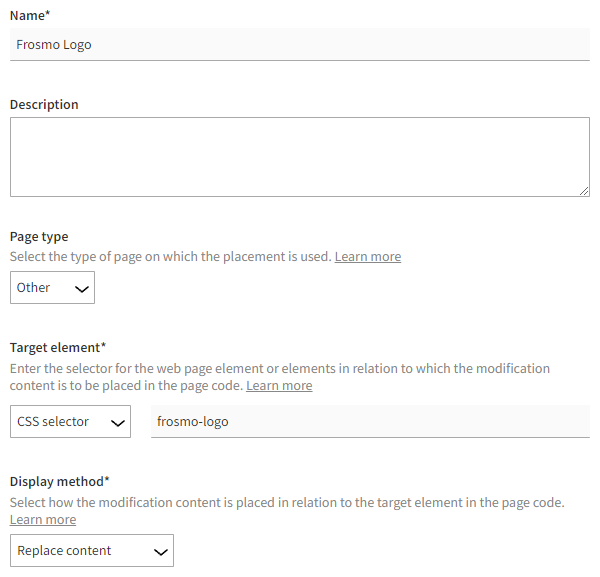
Name: Enter "Frosmo Logo".
-
Page type: Select Other.
-
Target element: Select CSS selector, and enter "frosmo-logo" as the selector name.
-
Display method: Leave this field to its default value.
-
-
Click Save.
You have created the placement. For more information about placement settings, see Creating and editing a placement.
Creating the modification
To create and activate the modification:
-
In the Control Panel, on the Modifications page, select the Overview tab.
-
Click Create modification.
-
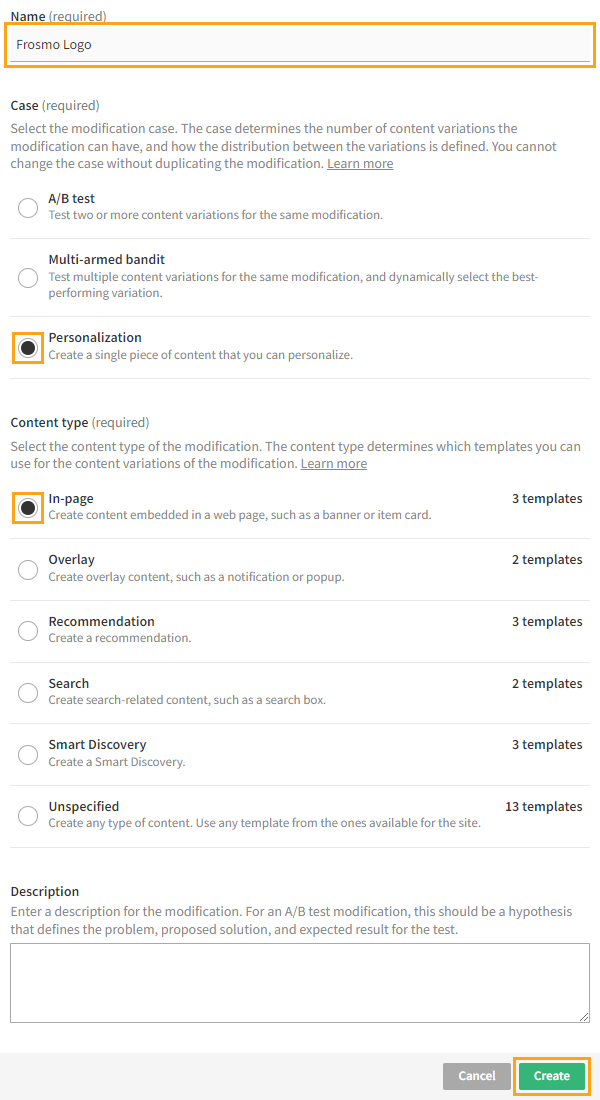
Enter "Frosmo Logo" as the modification name, select Personalization as the modification case, select In-page as the content type of the modification, and click Create. You could also select another case, but since this modification needs only the one variation, Personalization is the natural choice here.
The Basic settings view opens.
-
Select the placement for the modification:
-
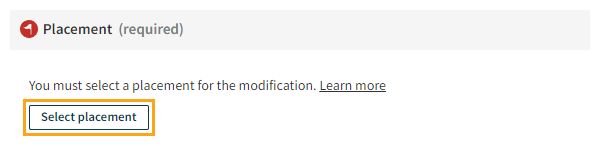
In the Placement section, click Select placement.
-
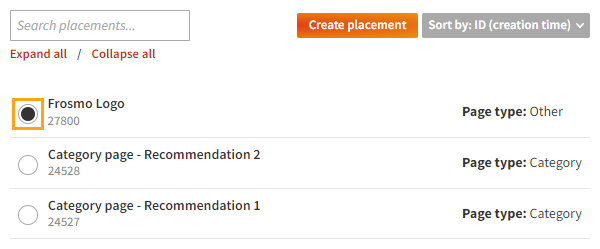
Select the Frosmo Logo placement you created earlier.
-
Click Save.
-
-
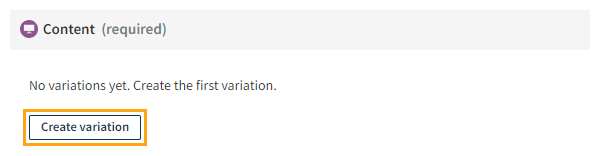
Define the content for the modification:
-
In the Content section, click Create variation.
-
In the variation settings, for Content source, select Custom.
-
In the Content field, enter the following code:
<a href="https://frosmo.com/" target="_blank" rel="noopener noreferrer">
  <img
    src="https://d2wzl9lnvjz3bh.cloudfront.net/message_files/2083/65511/9146/frosmo-logo.png"
    alt="frosmo-logo"
  />
</a> -
Click Save.
-
In the Content section, click the quick menu button for the variation, and select Activate.
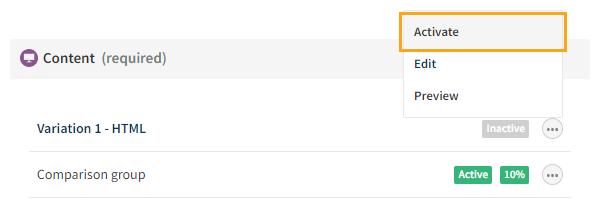
-
If you want to disable the automatically created comparison group for the modification, click the quick menu button for the group, and select Deactivate.
-
-
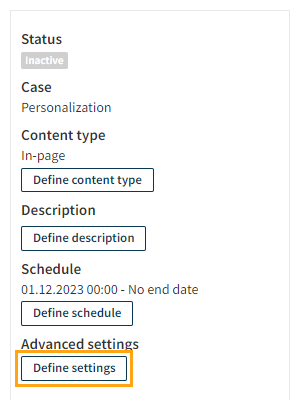
Disable basic conversion tracking and, if enabled, Google Analytics tracking for the modification:
-
In the Advanced settings section, click Define settings.
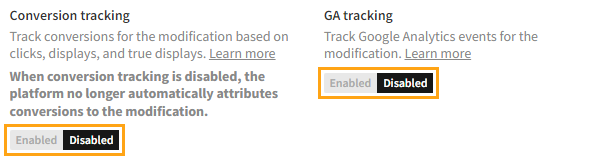
-
Disable Conversion tracking and GA tracking.
-
Click Save.
Since the modification is used purely for example purposes, and since the modification will not even be displayed on your actual site, you do not want to attribute conversions to or send Google Analytics events for the modification based on the clicks, displays, and true displays the modification receives. For more information about conversions and conversion attribution, see Data tracking solutions and Conversion attribution.
-
As a rule, do not disable basic conversion tracking for a modification.
If the Frosmo Platform is not integrated with Google Analytics for your site, the GA tracking setting is not available.
-
Activate the modification:
-
At the bottom of the Basic settings view, click Activate.
-
To confirm, click Activate.
-
You have created and activated the modification. For more information about modification settings, see Creating and editing a modification.
The content is now set up in the Frosmo Platform and ready to be used in a React application.
Installing and running Create React App
To install and run Create React App on your local computer or development server, follow the getting started instructions in the Create React App documentation.
For more information about Create React App, see:
Adding the Frosmo scripts to Create React App
To use the placement and modification in your React application, you need to integrate the application with the Frosmo Platform. You do this by adding the Frosmo scripts for your site to the application.
Since Create React App will use the same Frosmo scripts as your actual site, the data tracking that applies to the site will also apply to the application. Depending on what data tracking has been implemented for the site, the application may generate tracking data that skews your actual site statistics. In creating the modification, you've already disabled basic conversion tracking for the modification, so at least no conversions will be attributed to the modification based on the clicks, displays, and true displays it receives.
To add the Frosmo scripts to Create React App:
-
Get the Frosmo
<script>elements for your site. For more information, see Creating and managing sites. -
Edit the
/public/index.htmlfile of the application, add the<script>elements to the end of the<head>element, and save the file.
-
To check that the platform is successfully integrated with the application, open the browser console, and enter
frosmo.easy. If the integration platform and application are integrated, the console displays information about thefrosmo.easyobject.
If the object is undefined, or if the console displays an error, check that the
<script>elements in/public/index.htmlare correct.
Installing the React Connector to Create React App
To install the React Connector to your React application, follow the instructions in Installing the React Connector.
Creating the React components
With the content ready for use on the platform side, and with your application set up for interacting with the platform, all that remains is to create the React components that retrieve and render the content in the application. In this example, you only need to modify the /src/App.js file in Create React App.
To add the content to your application:
-
Open the
/src/App.jsfile in your editor. -
Replace the existing content with the following code. This code strips the page of everything but the React logo and rewrites the
Appcomponent as a class.import React, { Component } from 'react';
import logo from './logo.svg';
import './App.css';
class App extends Component {
render() {
return (
<div className="App">
<header className="App-header">
<img src={logo} className="App-logo" alt="logo" />
</header>
</div>
);
}
}
export default App; -
Import the
FrosmoPlacementcomponent from thefrosmo-reactmodule.import { FrosmoPlacement } from 'frosmo-react'; -
Add a
FrosmoPlacementcomponent as the first piece of content inside the<div>element, before the<img>element. Configure the component as follows:-
Define the
idprop as"frosmo-logo". This allows the React Connector to associate the component to the placement and modification you created earlier. -
Define the
defaultComponentprop as{DefaultContent}. This sets theDefaultContentcomponent, which you'll create later, as the initial content of the component. -
Define the component content as
<FrosmoLogo />. This sets theFrosmoLogocomponent, which you'll create later, as the actual content of the component.
For more information about the props, see Using the FrosmoPlacement component.
<FrosmoPlacement id="frosmo-logo" defaultComponent={DefaultContent}>
  <FrosmoLogo />
</FrosmoPlacement> -
-
Create the
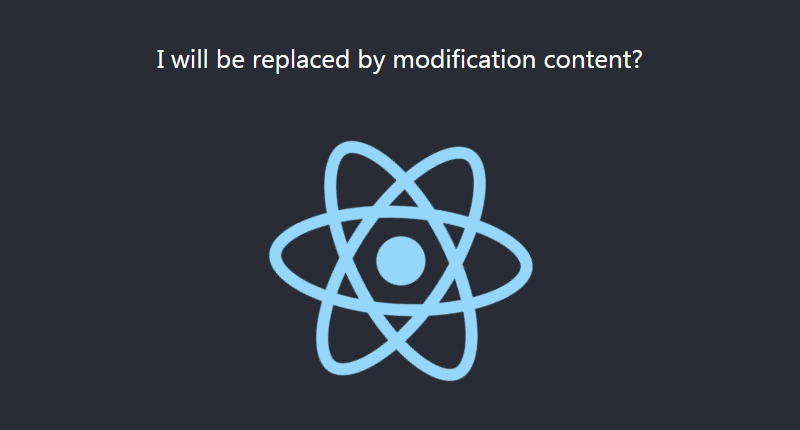
DefaultContentcomponent.class DefaultContent extends Component {
render() {
return (
<p>I will be replaced by modification content?</p>
);
}
} -
Create the
FrosmoLogocomponent. Get the modification content from thecontentproperty of thefrosmoModificationContextprop, and use thedangerouslySetInnerHTMLelement attribute provided by React to display the content. For more information about the prop, see Using the FrosmoPlacement component. For more information about the attribute, see the React documentation.class FrosmoLogo extends Component {
render() {
const content = { __html: this.props.frosmoModificationContext.content };
return (
<div dangerouslySetInnerHTML={content} />
);
}
} -
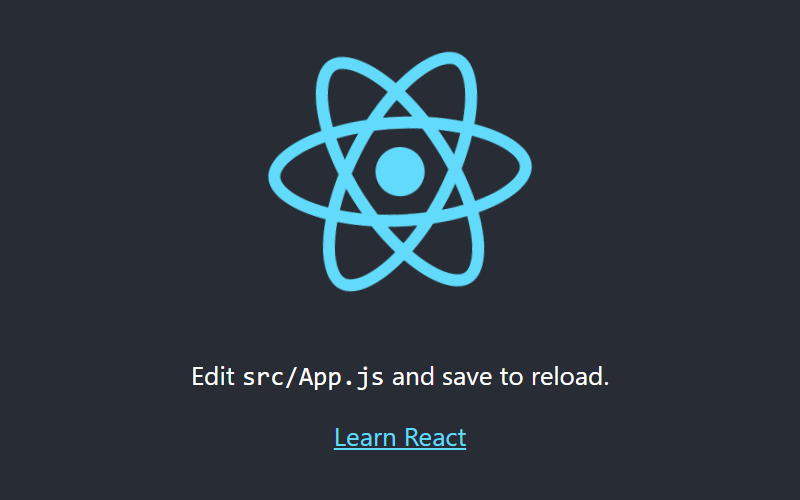
Save the file. Create React App automatically refreshes in your browser and now displays the Frosmo logo above the React logo.

Here's the full source code for /src/App.js:
import React, { Component } from 'react';
import logo from './logo.svg';
import './App.css';
import { FrosmoPlacement } from 'frosmo-react';
class App extends Component {
render() {
return (
<div className="App">
<header className="App-header">
<FrosmoPlacement id="frosmo-logo" defaultComponent={DefaultContent}>
<FrosmoLogo />
</FrosmoPlacement>
<img src={logo} className="App-logo" alt="logo" />
</header>
</div>
);
}
}
class DefaultContent extends Component {
  render() {
    return (
      <p>I will be replaced by modification content?</p>
    );
  }
}
class FrosmoLogo extends Component {
  render() {
    const content = { __html: this.props.frosmoModificationContext.content };
    return (
      <div dangerouslySetInnerHTML={content} />
    );
  }
}
export default App;
Personalizing the content
In this example, you personalize the content by only displaying it to visitors who have not opened the logo link. You do this by creating the appropriate segment and assigning the modification to that segment. Here, the segment is based on a trigger that tracks the Frosmo Logo modification for clicks.
To personalize the content:
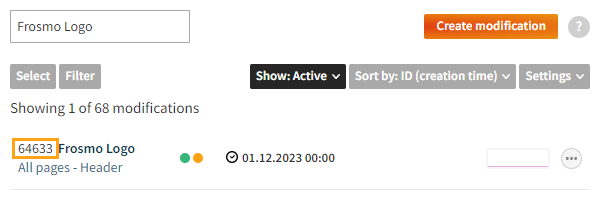
Copying the modification ID
To copy the modification ID, in the Control Panel, on the Modifications > Overview page, find and copy the ID of the Frosmo Logo modification.
You now have the modification ID you need for the trigger.
Creating the trigger
To create the trigger:
-
In the Control Panel, in the sidebar, select More > Triggers.
-
Click Create trigger.
-
Define the following settings:
-
Name: Enter "Frosmo Logo modification click".
-
Evaluation point: Select Core event, and select Modification click as the event.
-
Rules: Click Add new rule, click Event data, and define the trigger rule as: The data value of the Modification ID property is exactly <Frosmo Logo modification ID>
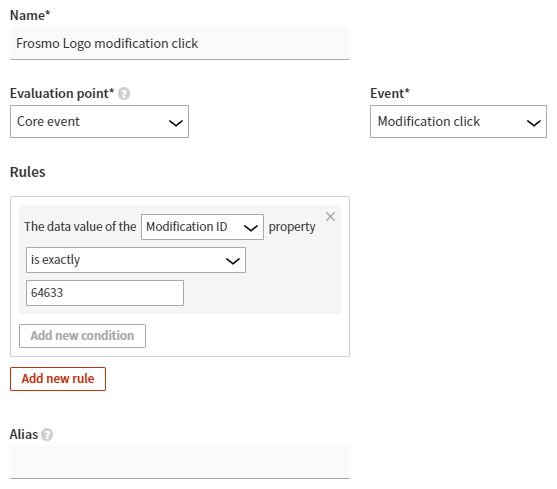
-
-
Click Save.
You have created the trigger. For more information about trigger settings, see Creating and editing a trigger.
Creating the segment
To create the segment:
-
In the Control Panel, in the sidebar, select Audiences.
-
Click Create segment.
-
Click Add new rule, and select Trigger.
-
Define the segmentation rule as: The visitor has triggered Frosmo Logo modification click more than or equal to 1 times, with each trigger event counted.
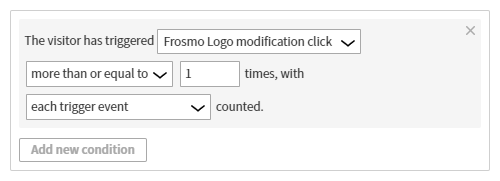
-
Select Description, and enter "Has clicked the Frosmo logo" as the segment name.
-
Click Save.
You have created the segment. For more information about segment settings, see Creating and editing a segment.
Updating the modification to use the segment
To update the modification to use the segment:
-
In the Control Panel, in the sidebar, select Modifications.
-
In the modifications list, find the Frosmo Logo modification, and click the modification name to open the modification settings.
-
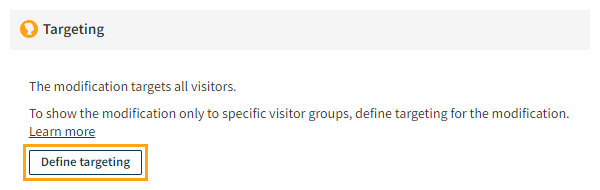
In the Targeting section, click Define targeting.
-
Click Select segments.
-
Select the Has clicked the Frosmo logo segment you created earlier.

-
At the bottom of the view, click Confirm.
-
In the segment selection, select is not.


-
At the bottom of the view, click Save.
You have update the modification. For more information about modification settings, see Creating and editing a modification.
If you now click the Frosmo logo and then refresh the page, the logo is no longer displayed, since you've been added to the Has clicked the Frosmo logo segment. Instead, the application displays the default content for the FrosmoPlacement component.
And you're done with this example!