Enabling and disabling the data layer
Before you can use the Frosmo data layer on a site, you need to enable the data layer module for the site. You do this in the Frosmo Control Panel or by using the Graniitti API.
When enabled, the data layer module initializes the data layer on page load by creating the global window.dataLayer array. If window.dataLayer already exists on the page, the module uses the existing array.
Only certain Frosmo users can enable and disable site modules. If you're a company-user, a Frosmo user enables and disables the modules for your site. For more information, contact Frosmo support.
Enabling or disabling the data layer module for a site has no impact on data passed to Google Tag Manager. The data layer module is a Frosmo Platform feature and only affects data passed to the Frosmo JavaScript library.
Enabling and disabling the data layer using the Frosmo Control Panel
To enable the data layer for a site:
-
In the Frosmo Control Panel, in the header, click your username, and select Company.
-
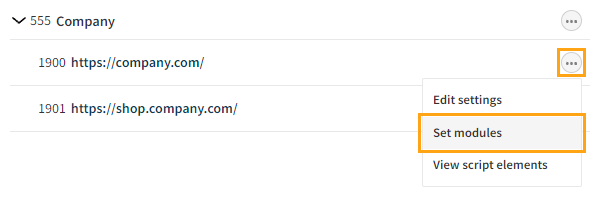
Click the quick menu button for the site, and select Set modules.
-
Click Add for Data layer.

-
Click Close.
You have enabled the data layer for the site. You can now push data to the data layer.
To disable the data layer for the site, follow the above steps, but click Active for Data layer.

Enabling and disabling the data layer using the Graniitti API
To enable the data layer for a site:
-
Send a PATCH request to
/companies/<company_id>/settings/data_layer_enabledwith thevalueproperty in the request body set totrue. This enables the data layer module for the site.curl -X PATCH \
--header 'Authorization: Bearer <access_token>' \
--header 'Content-Type: application/json' \
-d '{"value":true,"site_id":<site_id>}' \
'https://<graniitti_api_domain>/v0/companies/<company_id>/settings/data_layer_enabled'noteUse the correct access token, site ID, domain name, and company ID in the request.
-
Send a POST request to
/sites/<site_id>/js/export. This updates the custom script for the site, so that your changes are actually reflected on the site.curl -X POST \
--header 'Authorization: Bearer <access_token>' \
'https://<graniitti_api_domain>/v0/sites/<site_id>/js/export'noteUse the correct access token, domain name, and site ID in the request.
You have enabled the data layer for the site. You can now push data to the data layer.
To disable the data layer for the site, follow the above steps, but set the value property in the PATCH request body to false.
curl -X PATCH \
--header 'Authorization: Bearer <access_token>' \
--header 'Content-Type: application/json' \
-d '{"value":false,"site_id":<site_id>}' \
'https://<graniitti_api_domain>/v0/companies/<company_id>/settings/data_layer_enabled'
For more information about Graniitti API requests, see the Graniitti API guide.